Neutral grip pull-ups: what are we talking about?

CobraDos
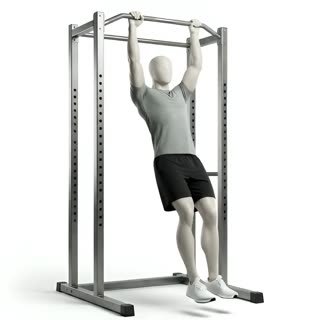
Neutral grip pull-ups are done with your palms turned inward, facing each other. The wrists stay in line with the forearms. There is no forced rotation and no wasted tension in the shoulder. It's also called the hammer grip, because the hand holds the handle like the handle of a tool. To train it, you need a pull-up bar with parallel handles, two suspension straps, or a V-handle hooked over a straight bar.
This variation has a great reputation in the gym. It's often the first grip you manage when you're starting out. The body lines itself up almost on its own, strength climbs fast, and the joint handles the load better. Some lifters went neutral from their very first sessions and never switched back.
Neutral grip pull-ups: which muscles are working?
The back leads the movement

Tirage verticalDos · poulies
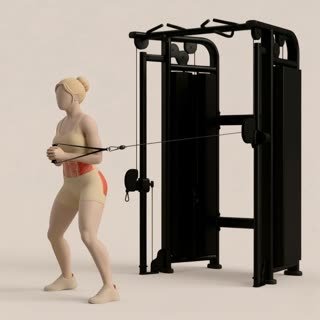
This grip lets you work the lats through a long range of motion. The lats pull the arm down and back. The teres major, the rhomboids and the lower traps follow along. The movement looks like a lat pulldown on the cable machine, except that the load is you.
Biceps and brachioradialis backing it up
The angle of your hands puts the elbow in a very good position. The brachioradialis and the brachialis take a big share of the work. The biceps chips in too: less than with a supinated grip, far more than with a pronated grip. So you can slot the exercise into a back or arm session without a second thought.
- Lats and teres major: the engines of the movement
- Brachioradialis and brachialis: heavily involved
 Biceps brachii: a solid contributor
- Traps, rhomboids and rear delts: stabilizers
- Core: it keeps the torso in line
How do you do neutral grip pull-ups?
The starting position
Grab the handles, thumbs wrapped around. Think about setting your hands at shoulder width, or slightly narrower. Hang with straight arms, shoulders down, ribs locked. This starting position should be calm and stable before the first rep.
The pull, from bottom to top
Start by pulling your shoulder blades down. Then drive your elbows down, along your torso. No need to pull with your arms alone: the back has to start the movement. Go until your chin clears the bar, or even higher. Keep your torso almost vertical and your eyes straight ahead. Breathe out on the way up, in on the way down.
The way down counts just as much
Lower yourself slowly, over two to three seconds. Go all the way to straight arms, without letting the shoulders go completely. This braked phase is what will give you a big share of your progress. Then string your reps together without swinging your hips.
The most common mistakes
- Pulling yourself up with a hip kick to steal one more rep
 Setting your hands too far apart, which pinches the shoulder
- Going halfway up and cutting the range short
- Sinking your head into your shoulders during the pull
- Forgetting to brace: the lower body drifts backwards
Neutral, pronated or supinated grip?
Neutral grip vs pronated pull-ups
With a pronated grip, the palms face forward. That version stretches the lat more on the sides. It's also harder, especially off the bottom. The neutral grip gives you more clean reps and less joint discomfort. For back width, pronated keeps a slight edge. For total training volume, neutral comes out ahead.
Neutral grip or supinated pull-ups
With a supinated grip, the palms face you. The biceps then takes centre stage. The neutral grip splits the effort between the back and the elbow flexors. If your wrists start burning in supination, it becomes the better choice. It's also the kindest version for sensitive elbows.
Close grip or wide grip?
Pull upDos · traction
A close neutral grip, hands roughly eight inches apart, lengthens the range of motion and lights up the arms. It's perfect for getting started or for piling up volume. A wide neutral grip pull-up feels closer to the pronated version, with more tension on the sides of the back. Alternate the two over the weeks: it's the simplest way to leave nothing out.
The benefits of neutral grip pull-ups
 Shoulders protected, because the rotation stays neutral
- More reps from your very first session
- Far less stress on the wrists and elbows
 One exercise for both back and arms
- Easy to load up with a dip belt
It's also possible to do it almost anywhere: a doorway bar, park bars, gymnastic rings. That freedom explains a good part of its success. As for opinions, coaches and lifters nearly always rank it in the top three bodyweight back exercises.
Moving your pull-ups forward
Aim for three to four sets of six to ten reps, twice a week. Once you pass twelve clean reps, you can add weight. Ten pounds is enough to restart the progress. If you can't get up on your own yet, stick with the band and the slow negatives.
You can also do this movement at the end of a session, right after a lat pulldown. The back is already warm and your technique stays clean. Write your sets down in a notebook: the numbers tell the story of your progress better than how you felt.
An outside eye changes everything on this movement. A good coach fixes your position in two sessions, where you'd lose months on your own. On Koatcher, you can find a personal trainer near you and send them a video of your pull-ups.